Viewers and Debugging#
Newton provides multiple viewer backends for live visualization, debugging, historical inspection, persistent recording, and external integrations.
Deformable visual meshes#
Experimental
Experimental feature. API, behavior, defaults, and supported use cases may change without prior notice.
A deformable visual mesh is a triangle mesh that follows simulation elements
without adding mass or collision geometry
(DeformableVisualMesh). It is separate from the
deformable object records in Deformable Objects. This guide
shortens the name to visual mesh. Evaluating a mesh’s current shape is
skinning, so the viewer GUI calls these skinned meshes, and USD import
calls the authored source a graphics mesh. Attach one to simulation
particles with explicit particle indices:
visual_index = builder.add_deformable_visual_mesh(
    vertices, indices, kind="particle", parent=particle_indices, label="skin"
)
model = builder.finalize()
mesh = model.deformable_visual_meshes[visual_index]
Each visual vertex is placed at its particle’s current position; vertices
only records the bind pose. Every driving particle must belong to one world.
Builder composition and replication offset the particle indices and keep the
authored rest geometry. Meshes with equal rest vertices and indices share
device storage, including replicated copies, while their bindings stay
independent. Do not edit the finalized arrays in place.
Evaluate the current positions and normals for a state:
visuals = newton.geometry.DeformableVisuals(model)
visuals.update(state)
points = visuals.get_points(visual_index)
Allocate once and reuse the output. Update it before reading; it does not track
which state is current. Allocate the output before CUDA capture and replay
before consuming the result. Call visuals.wait() when consuming on another
stream. Finish reads before the next update overwrites the buffers. Allocate
separate outputs for simultaneous snapshots. Skinning is not differentiable.
A warm-up update is recommended to load kernels before capture. Newton does
not warn when it is skipped: Warp can also load kernels during capture on
supported drivers. See capture_begin() for kernel-loading options.
Capture records the update but does not execute it:
visuals = newton.geometry.DeformableVisuals(model)
visuals.update(state)  # Recommended: load kernels before capture.
with wp.ScopedCapture(model.device) as capture:
    visuals.update(state)
wp.capture_launch(capture.graph)  # Run before a viewer or camera reads the output.
Keep captured input and output arrays alive without replacing their storage.
Triangle and tetrahedron bindings take explicit parent elements and barycentric weights. Name the owning elements either through a recorded deformable object or through a raw element range:
# Cloth from add_cloth_mesh(): the surface's index in builder.surface_label.
visual_index = builder.add_deformable_visual_mesh(
    vertices, indices, kind="triangle", surface=0, parent=parent_tris, weights=weights
)
# Geometry built without a record: pass its [start, end) element range.
visual_index = builder.add_deformable_visual_mesh(
    vertices, indices, kind="tetrahedron", tet_range=(tet_start, tet_end),
    parent=parent_tets, weights=barycentric_weights,
)
Each triangle uses three weights; each tetrahedron uses four. Weights must be
nonnegative and sum to one. parent holds global element indices inside the
owning object or range. These bindings follow the weighted particle positions;
there is no surface-normal offset.
For automatic triangle binding, omit both parent and weights:
visual_index = builder.add_deformable_visual_mesh(vertices, indices, kind="triangle", surface=0)
Each vertex projects onto the nearest non-degenerate triangle of the owning object or range. The normal offset is discarded. Equal-distance ties choose the first triangle.
For automatic tetrahedron binding, omit both parent and weights:
visual_index = builder.add_deformable_visual_mesh(vertices, indices, kind="tetrahedron", volume=0)
Each vertex follows a containing non-degenerate tetrahedron of the owning object or range; among several, the one it lies deepest inside wins, then the lowest index. An outside vertex is clamped into the owning tetrahedron with the nearest centroid, which can move it sideways, and Newton logs how many were clamped. The fallback never leaves the owning object or range.
Rigid bodies, such as rod segments, can drive a mesh without simulation particles:
# Rod from add_rod(): the curve's index in builder.curve_label.
visual_index = builder.add_deformable_visual_mesh(vertices, indices, kind="body", curve=0)
# Any rigid bodies: pass the candidates, or name one body per vertex through parent.
visual_index = builder.add_deformable_visual_mesh(vertices, indices, kind="body", bodies=rod_bodies)
Each vertex binds to the candidate whose center of mass is nearest and then follows that body’s full pose; equal distances use candidate order. The bind pose is stored as body-local offsets, so separate body bindings can show seams. Fixed-joint collapse remaps these offsets, including vertices fixed to the world. Composition preserves the placement and owning world.
Supported viewers draw skinned meshes through
log_state(). The Show Skinned Meshes option
is independent of Show Visual and the simulation triangle display. World
spacing and layer placement also apply to skinned meshes.
viewer.set_model(model)
viewer.set_deformable_visuals(visuals)  # Optional; the viewer otherwise evaluates.
viewer.log_state(state)
Update shared output before logging. Hidden meshes stop uploading geometry;
showing them restores the latest evaluated points. Backend differences are
listed below. ModelBuilder.add_usd() can bind graphics meshes to imported
deformables; see Importing deformable visual meshes.
Pass per-vertex uvs and an image array or path as texture when adding a
visual mesh. GL, USD, RTX, and Rerun viewers pick up a new mesh.texture
array or path when the mesh is next logged; set it to None to remove the
texture. Editing an image in place or changing a file at the same path is not
supported for these cached assets. ViewerFile records
the texture it sees when the model is recorded, and
SensorCamera loads textures once at construction. For
ordinary log_mesh() meshes, GL, USD, and RTX remove a previously bound
texture when a later call omits texture or uvs. Skinned meshes keep
their topology fixed.
USD exports replacement image arrays to separate files. Unchanged arrays reuse their existing file. Material bindings are not time-sampled: the export uses the last assigned texture, not a texture animation. RTX updates the material binding after any in-flight render finishes, without replacing mesh geometry. RTX applies UVs supplied with a replacement image, including to its instances. Changing only UVs while reusing the same image object or file path is not supported. These updates are intended for occasional appearance changes, not video textures. Distinct image contents create separate PNG files. USD keeps those files next to the exported stage. RTX keeps them in its private temporary directory until the viewer closes, so many unique replacements can use substantial disk space during a session. Reuse a fixed set of image arrays or file paths for bounded texture variation.
ViewerFile records deformable visual meshes and
simulation state without evaluating them. JSON and binary recordings rebuild
their skinning batches on first use. Load into an empty Model to restore the
recorded meshes. A finalized Model that already has meshes keeps them; the
recording’s driver counts and mesh layout must then match. Older physics-only
recordings still load into a compatible model with meshes.
Viewer |
Support |
Backend differences |
|---|---|---|
GL |
Draws |
Uploads topology once and reuses textures. Either mesh CUDA interop flag enables device-side vertex updates; otherwise it uses host uploads. Each mesh copy uploads its own texture. |
USD |
Exports |
Writes time-sampled geometry. Texture replacement updates the material for the whole recording. |
RTX |
Draws |
Uses USD meshes and textures. When borrowing a stage, overlays start hidden and do not replace authored prims; enable them explicitly. |
Rerun |
Draws |
Decodes each texture path once per model layer, but re-logs each visible mesh with its texture every frame. |
File |
Records |
Saves mesh data and simulation state for playback. Does not evaluate skins and ignores the display option. |
Null |
No drawing |
Does not evaluate skins and ignores the display option. |
Viser |
No drawing |
Skinned meshes are off by default; enabling them raises an error. Simulation geometry remains available. |
For example, bind a triangle to a small cloth and evaluate its current points:
import newton
import newton.geometry
import numpy as np
import warp as wp

builder = newton.ModelBuilder()
builder.add_cloth_grid(
    pos=(0.0, 0.0, 1.0), rot=wp.quat_identity(), vel=(0.0, 0.0, 0.0),
    dim_x=2, dim_y=2, cell_x=0.5, cell_y=0.5, mass=0.1, label="cloth",
)
mesh_index = builder.add_deformable_visual_mesh(
    vertices=[(0.1, 0.1, 1.0), (0.4, 0.1, 1.0), (0.1, 0.4, 1.0)],
    indices=[0, 1, 2], kind="triangle", surface=0,
)
model = builder.finalize()
visuals = newton.geometry.DeformableVisuals(model)
state = model.state()
visuals.update(state)
assert visuals.get_points(mesh_index).shape == (3,)
Camera sensor output#
Experimental
The camera’s deformable_surface_mode option and its deformable_visuals=
argument may change without a formal deprecation cycle.
SensorCamera evaluates visual meshes automatically during
update(). It uses the current mesh for RGB, depth, normals, and albedo output.
In shape_index_image a visual mesh reports the same triangle-mesh value as a
simulation cloth; per-mesh ids are not available yet. Visual meshes follow
RenderConfig.enable_backface_culling like the simulation surface, so their back
faces are hidden by default, whereas the viewers draw them from both sides. Both
surfaces share one ray-traced mesh that keeps only the closest hit, so a culled
back face also hides the deformable surfaces behind it, as for a folded cloth. All
native binding types are supported: particles, triangles, tetrahedra, and rigid
segments. Physics and collision geometry remain unchanged.
Visual meshes can overlap the simulation surface or lie inside it. Drawing both
may hide parts of the visual mesh. With culling on, a skin wound opposite to its
cloth can leave a hole where its back face is the closest hit. The camera
renders both by default, as the viewers do, and does not guess which simulation
triangles a visual mesh covers. deformable_surface_mode selects the surfaces at
construction: SensorCamera.DeformableSurfaceMode.VISUAL_ONLY leaves every
simulation triangle out and SIMULATION_ONLY leaves the visual meshes out.
Both surfaces share one ray-traced mesh, so this is a constructor argument
rather than a render setting; construct a second camera for another view. Rigid
shapes and standalone particles are unaffected, particles belonging to a
left-out surface do not reappear as spheres, and
RenderConfig.enable_particles=False hides standalone particles too.
The viewer switches show_triangles=True, show_deformable_visual_meshes=True
correspond to BOTH; True, False corresponds to SIMULATION_ONLY;
and False, True corresponds to VISUAL_ONLY. Unlike a viewer, the camera
does not offer a mode that hides both surfaces.
Texture files are loaded when the camera is constructed, including textures on
visual meshes. A missing file can therefore fail construction even for depth-only
output or when RenderConfig.enable_textures=False. Pass
SensorCamera(model, load_textures=False) to skip loading all textures, for
example when replaying a recording without its image files.
By default, the camera skins visual points directly into its own buffer, in at most four launches however many worlds were replicated. It does not compute unused vertex normals. Create the camera once:
from newton.sensors import SensorCamera

camera = SensorCamera(
    model,
    default_render_config=SensorCamera.RenderConfig(enable_textures=True),
    deformable_surface_mode=SensorCamera.DeformableSurfaceMode.VISUAL_ONLY,
)
Allocate the camera inputs once as well. Then render each frame from the current state:
rays = camera.compute_camera_rays_pinhole(32, 32, camera_fov=np.deg2rad(45), device=model.device)
poses = wp.array([wp.transform(wp.vec3(0.5, 0.5, 3.0), wp.quat_identity())], dtype=wp.transform, device=model.device)
color = camera.allocate_image_color(1, 32, 32)
depth = camera.allocate_image_depth(1, 32, 32)

camera.update(state, poses, rays, color_image=color, depth_image=depth)
If a viewer already needs evaluated visuals, both can reuse the result
(ViewerNull only stands in for a rendering viewer here):
from newton.viewer import ViewerNull
viewer = ViewerNull()
viewer.set_model(model)

visuals = newton.geometry.DeformableVisuals(model)  # Allocate once.
viewer.set_deformable_visuals(visuals)

visuals.update(state)  # After each simulation step.
viewer.begin_frame(0.0)
viewer.log_state(state)
viewer.end_frame()
camera.update(state, poses, rays, color_image=color, depth_image=depth, deformable_visuals=visuals)
Supplied output is consumed as-is. Update or replay it before rendering; the camera does not check its source state or freshness. It waits for the submitted visual update, then copies the points into its own buffer on the model device. On CUDA this is a GPU-to-GPU copy, not a CPU transfer. The camera does not repeat skinning. Finish consumption before overwriting shared output.
The camera uploads topology, UVs, and textures during setup. After that it skins or copies visual points into its vertex buffer on the model device and refits the triangle BVH. CUDA models do not copy those vertices through the CPU. Warm up skinning and rendering before capturing them in a CUDA graph. Each mesh keeps its model world; viewer-only world offsets do not affect camera images.
When no visual meshes are selected, simulation triangles keep using the supplied State’s particle buffer. Switching to a different buffer rebuilds that mesh’s BVH.
UV textures can come from a file or an in-memory image. Configure them before
creating the sensor; later texture changes require a new sensor, and
load_textures=False leaves visual meshes untextured like shape meshes. Texture alpha
does not make the surface transparent. Untextured skins are white before
lighting. The camera uses triangle normals, not the smooth normals used by some
viewers. Cubic and triplanar texture projection are not supported for skinned meshes.
Choosing a Viewer#
Choose a viewer based on whether you need a live display, history within the current viewer session, or a persistent artifact:
Viewer |
Best for |
Inspection or output |
Dependencies |
|---|---|---|---|
Interactive development and live debugging |
Real-time display; frame capture |
pyglet, imgui_bundle |
|
Path-traced visualization on NVIDIA GPUs |
Real-time display; frame capture |
ovrtx, ovstage, usd-core, pyglet ( |
|
Persistent state-snapshot recording and visual playback |
|
None for JSON; cbor2 for binary |
|
Persistent scene export for 3D pipelines |
Time-sampled |
usd-core |
|
Live visualization and optional session timeline inspection |
Web interface |
rerun-sdk |
|
Browser or notebook visualization and visual recording |
Web interface; |
viser |
|
Headless or automated execution without visualization |
None |
None |
Debugging with Viewers#
Newton’s viewers use cooperative, explicit logging rather than automatically
inspecting every part of a simulation. Call
set_model() to provide the scene structure and
log_state() each frame to provide its motion.
Contacts appear only when the application calls
log_contacts(). Forces, targets, normals,
metrics, and other diagnostics similarly require explicit log_*() calls.
The way these diagnostics are presented and whether their history is retained
depends on the viewer backend.
Use a live viewer such as ViewerGL to inspect the
current scene and add custom overlays for
contacts or other diagnostic data. For historical inspection, enable
keep_historical_data in ViewerRerun to retain a
timeline for the current viewer session, or use
ViewerFile to create a persistent state-snapshot
recording for later visual playback. ViewerViser and
ViewerUSD instead create persistent visual or scene
artifacts for sharing and external tools.
Current viewers do not automatically capture solver internals or all the inputs needed to reproduce a simulation. Recording and diagnostic capture will be expanded in the future.
Common Interface#
All viewer backends inherit from ViewerBase and share a common interface:
Core loop methods — every viewer uses the same simulation loop pattern:
set_model()— assign aModel(useset_visible_worlds()afterwards to limit the number of rendered worlds)begin_frame()— start a new frame with the current simulation timelog_state()— update the viewer with the currentState(body transforms, particle positions, etc.)end_frame()— finish the frame and present itis_running()— check whether the viewer is still open (useful as a loop condition)is_paused()— check whether the simulation is paused (toggled withSPACEinViewerGL)should_step()— call exactly once per frame; returnsTruewhen running, orTrueonce after a single-step request (triggered with.or the “Step” button inViewerGL) andFalseotherwise; prefer this over composingis_paused()manuallyset_rendering_paused()/is_rendering_paused()— freeze or resume the displayed image independently of simulation stepping in GL and RTXclose()— close the viewer and release resources
Rendering pause (GL and RTX):
Click Pause Rendering, or call viewer.set_rendering_paused(True), to
freeze the last displayed image while simulation may continue. UI controls,
plots, window resize, and close events remain active. Camera navigation and
scene picking/gizmos are disabled while the image is frozen. The ordinary
Pause and Step controls still govern simulation independently.
Continue calling begin_frame(), logging updates, and end_frame() during
rendering pause. The viewer retains the latest scene updates, including
transforms, visibility, debug geometry, and programmatic camera changes.
Resuming renders the current state without replaying intervening frames.
Frame-scoped UI annotations and fullscreen-image requests keep their normal
per-frame lifetime. A fullscreen image already displayed stays frozen too.
viewer.set_rendering_paused(True)
while viewer.is_running():
    if viewer.should_step():
        simulation.step()
    viewer.begin_frame(simulation.time)
    viewer.log_state(simulation.state)
    viewer.end_frame()  # Keep servicing the window and Resume control.
Rendering pause also works programmatically in headless mode. num_frames
continues to count viewer-loop frames during pause; windowed viewers continue
to ignore that budget. GL frame capture and RTX screenshots return the frozen
image while paused. With no previously displayed image, the background is
empty and capture raises RuntimeError; headless RTX uses the last image
accepted by the viewer. Clearing or replacing the model invalidates the image
but preserves the rendering-pause setting. Other backends report False
and ignore requests to enable rendering pause.
RTX retains its existing rendering modes: the default async_rendering=True
submits one frame asynchronously and waits for it on the next unpaused
end_frame(); False renders synchronously. Rendering pause neither
waits for nor submits a renderer frame. Any outstanding async result is held
and discarded on resume, so it cannot replace the frozen image. Resume
publishes the latest retained scene updates and follows the selected mode’s
usual presentation cadence; async mode displays that new result on the
following frame. Scene updates remain bounded to the latest values per object.
Initial renderer/model loading, explicit cleanup, and an unpaused render can
still wait for GPU work. Rendering pause does not interrupt those operations.
Windowed RTX and GL retain a separate RGBA image texture so changes to the scene, camera, or fullscreen images cannot overwrite the frozen image. This requires four extra bytes per pixel (about 33 MB at 3840 x 2160), plus a GPU image copy on every unpaused frame, even if rendering pause is never used. The copy preserves the displayed image if a logged fullscreen texture is updated or the render target is resized before pause is requested. Headless RTX likewise keeps a GPU copy of the last accepted image, independent of any outstanding async render.
Camera and layout:
set_camera()— set camera position, pitch, and yawcamera_speed— set keyboard camera translation speed in m/sset_world_offsets()— arrange multiple worlds in a grid with a given spacing along each axis
Custom visualization — draw debug overlays on top of the simulation:
log_lines()— draw line segments (e.g. rays, normals, force vectors)log_points()— draw a point cloud (e.g. contact locations, particle positions)log_contacts()— visualizeContactsas normal lines at contact pointslog_gizmo()— display a transform gizmo (position + orientation axes)log_scalar()/log_array()— display numeric diagnostics as scalar plots or array visualizations; see Live Plotslog_image()— display a single or batched image in aViewerGLorViewerRTXdock or fullscreen surface, or in the selected-image panel ofViewerViser(no-op on other backends)
Limiting rendered worlds: When training with many parallel environments, rendering all worlds can impact performance.
All viewers support set_visible_worlds() to limit visualization to a subset of environments:
builder = newton.ModelBuilder()
body = builder.add_body(mass=1.0)
model = builder.finalize()

# Only render the first 4 environments
viewer = newton.viewer.ViewerNull()
viewer.set_model(model)
viewer.set_visible_worlds(range(4))
Live Plots#
log_scalar() and
log_array() provide numeric diagnostics with
backend-specific displays:
ViewerGLandViewerRTXdisplay rolling scalar line plots and heatmaps for scalar, 1-D, and 2-D NumPy or Warp arrays in a Plots window.ViewerViserdisplays rolling scalar line plots in the sidebar. Generic array visualization is not supported.ViewerRerunforwards scalar and array data to Rerun’s native scalar visualization.
For ViewerGL, ViewerRTX, and ViewerViser, set
plot_history_size when constructing the viewer to configure the number
of plotted scalar samples (default: 250). Use smoothing to average a
group of raw samples into each plotted point, and clear=True with
log_scalar to reset a signal’s history and pending smoothing samples.
For example, with ViewerGL or ViewerRTX:
viewer.log_scalar("Training/reward", reward, smoothing=10)
viewer.log_array("Training/observations", observations)
In ViewerGL and ViewerRTX, pass None to log_array to remove
a heatmap. Logging works before the first rendered frame and in headless
mode; plots are displayed when the viewer window and its UI are active.
ViewerRerun controls history through keep_scalar_history for
scalars and keep_historical_data for arrays. It ignores clear and
smoothing, and passing None to log_array is a no-op.
Real-time Viewers#
Headless Mode and Frame Capture#
ViewerGL and ViewerRTX support
headless=True to render off-screen without opening a window. Both implement
get_frame() to capture the last rendered frame
as an RGB Warp array on the viewer device with shape (height, width, 3),
dtype wp.uint8, and a top-left origin. Other viewers inherit the base
implementation, which raises NotImplementedError because they do not
support frame capture. Call it after end_frame() in either headless or
windowed mode:
viewer = newton.viewer.ViewerGL(headless=True)  # Or ViewerRTX(headless=True)
viewer.set_model(model)

viewer.begin_frame(sim_time)
viewer.log_state(state)
viewer.end_frame()

frame = viewer.get_frame()
rgb = frame.numpy()  # NumPy uint8 array with shape (height, width, 3)

# Reuse the output buffer after rendering subsequent frames.
viewer.get_frame(output=frame)
Use an image library to save the captured pixels, for example:
from PIL import Image

Image.fromarray(rgb).save("screenshot.png")
UI overlays are excluded by default. ViewerGL supports
get_frame(render_ui=True) to include them; ViewerRTX does not support
that option. RTX also does not support capturing fullscreen images displayed
with log_image(..., fullscreen=True): get_frame() raises
NotImplementedError for those frames. Capture resumes after the next scene
render. RTX capture uses the fixed render resolution and reads through CPU
memory. With asynchronous rendering, get_frame() waits for the render
submitted by the latest end_frame() so each captured image contains the
latest logged state. Capturing a frame therefore blocks until that render
completes.
Note
For ViewerGL on a machine without a display, pyglet must also be put in headless mode.
pyglet binds its display backend the first time that backend is imported, and Newton imports pyglet’s window
and display modules when the first ViewerGL is constructed, so the
option has to be set before that point. Otherwise the snippet above fails with
pyglet.display.xlib.NoSuchDisplayException: Cannot connect to "None" on Linux, since
pyglet defaults to Xlib. Either set the environment variable:
PYGLET_HEADLESS=1 python your_script.py
or set the option in Python before creating the viewer:
import newton
import pyglet

pyglet.options["headless"] = True

viewer = newton.viewer.ViewerGL(headless=True)
On a machine with several GPUs, PYGLET_HEADLESS_DEVICE (or
pyglet.options["headless_device"]) selects which one renders; it defaults to 0,
which is not necessarily the device the rest of the simulation runs on.
OpenGL Viewer#
Newton provides ViewerGL, a simple OpenGL viewer for interactive real-time visualization of simulations.
The viewer requires pyglet (version >= 2.1.6) and imgui_bundle (version >= 1.92.0) to be installed, and a graphics driver that supports OpenGL 3.3 or newer.
viewer = newton.viewer.ViewerGL()

viewer.set_model(model)

# at every frame:
viewer.begin_frame(sim_time)
viewer.log_state(state)
viewer.end_frame()

# advance the simulation each frame, or step once when paused:
if viewer.should_step():
    pass  # call solver.step(), example.step(), etc.
Interactive forces and input:
apply_forces() applies viewer-driven forces (object picking with right-click, wind) to the simulation state.
Call it each frame before stepping the solver:
viewer.apply_forces(state)
solver.step(model, state, ...)
The picking behind right-click dragging is a Picking controller, exposed as
viewer.picking. Applications with their own input handling or renderer can create one directly,
call pick(), update(), and
release() from their cursor events, and call
apply_force() before each solver step. To drive the target from a 3D input
such as a gizmo, assign pick_target instead of calling update().
Tune the spring through pick_stiffness and
pick_damping, for example viewer.picking.pick_stiffness = 200.0.
is_key_down() queries whether a key is currently pressed.
Keys can be specified as single-character strings ('w'), special key names ('space', 'escape'), or pyglet key constants:
if viewer.is_key_down('r'):
    state = model.state()  # reset
Custom UI panels:
register_ui_callback() adds custom imgui UI elements to the viewer.
The position parameter controls placement: "side" (default), "stats", "free", or "panel":
def my_ui(ui):
    import imgui_bundle.imgui as imgui
    imgui.text("Hello from custom UI!")

viewer.register_ui_callback(my_ui, position="side")
Viewer controls:
Key(s) |
Description |
|---|---|
|
Move the camera in the ground plane |
|
Move the camera down or up |
Left drag |
Look around |
Middle drag |
Orbit around the current camera pivot |
|
Pan the camera and pivot |
|
Dolly toward or away from the pivot |
Mouse wheel |
Dolly toward or away from the pivot |
|
Adjust field of view |
|
Frame the visible model and set the orbit pivot |
|
Toggle the sidebar |
|
Pause or continue the simulation |
|
Step the simulation by one frame while paused |
|
Close the viewer |
Right click |
Pick objects |
Orbit mode keeps the pivot fixed while the camera rotates around it. Use F to center the pivot on the model, Shift + middle drag to pan the pivot with the camera, and the mouse wheel to change the orbit distance.
Troubleshooting:
If you encounter an OpenGL context error on Linux with Wayland:
OpenGL.error.Error: Attempt to retrieve context when no valid context
Set the PyOpenGL platform before running:
export PYOPENGL_PLATFORM=glx
This is a known issue when running OpenGL applications on Wayland display servers.
RTX Viewer#
ViewerRTX provides real-time path-traced rendering using the NVIDIA OVRTX renderer.
It builds a USD scene on the first frame and updates rigid-body transforms each frame through OVStage,
presenting the result in a pyglet/OpenGL window.
Debug geometry can be added before or after the first rendered frame using
log_shapes(), log_points(),
log_lines(), and log_arrows().
For custom markers, register a triangle mesh with log_mesh()
and place it with log_instances(). Instance batches support
changing counts, transforms, scales, colors, and visibility. RTX arrows have cylinder shafts
and cone heads; their width specifies the shaft radius in meters.
Note
The RTX viewer is experimental and may not have the same functionality as the OpenGL viewer.
Note
The first image can take a while to appear while OVRTX loads and compiles RTX shaders. A blank window during this startup work does not necessarily indicate a rendering failure; wait for shader compilation to finish before diagnosing the viewer.
Installation: Requires the rtx dependency group:
uv sync --extra rtx
This installs ovrtx 0.5.1.385782 or newer (the NVIDIA OVRTX renderer), ovstage 0.2.1.385922 or newer
for runtime scene management, and usd-core, in addition to pyglet for the window.
ViewerRTX has been validated with the following renderer configurations:
ovrtx==0.5.1.385782withovstage==0.2.1.385922(minimum-dependency CI; Isaac Lab 3.0)ovrtx==0.6.0.1791947691withovstage==0.3.0.1791986420(locked GPU CI configuration)
Only the exact pairs above are part of Newton’s validated matrix. Upgrade ovrtx and ovstage
together to one of these pairs. Mixed release pairs are unvalidated; OVRTX 0.5.1 fails to start with OVStage 0.2.0.
viewer = newton.viewer.ViewerRTX(environment="studio")

viewer.set_model(model)

# at every frame:
viewer.begin_frame(sim_time)
viewer.log_state(state)
viewer.end_frame()
The live plots use imgui_bundle, included in
the examples dependencies. Install both RTX viewer and UI dependencies
with uv sync --extra rtx --extra examples.
Lighting and render settings: For custom lighting, pass environment="none" and add a USD layer with your
lights, e.g. an HDR DomeLight, via add_background_usd() before the first frame.
render_settings authors omni:rtx:* attributes on the viewer’s render product:
viewer = newton.viewer.ViewerRTX(
    environment="none", render_settings={"omni:rtx:pt:samplesPerPixel": ("uint", 4)}
)
viewer.add_background_usd("lighting.usda")
Rendering an existing USD scene#
ViewerRTX(ovstage=stage) renders a populated ovstage.Stage with its authored
materials and lights instead of building a scene from the model. The stage presents the scene; Newton only moves it:
Bodies:
set_model()binds each Newton body to the stage prim whose path equals the body’sbody_label, andlog_state()writes the body’s simulated world pose to that prim, keeping the prim’s authored scale.add_usd()labels each body with the path of its rigid-body prim, so importing the scene the stage holds yields matching labels. Bodies without a matching prim are not rendered and trigger a warning; bodies sharing a label are rejected. Bodies merged bycollapse_fixed_jointsleave their prims without a body; such prims move only if they are descendants of the prim they were merged into.Frames: If the import re-oriented the stage, through up-axis alignment or
xform,set_model()infers the model-to-stage transform from the root bodies, whose poses must still match the stage’s. Bodies then stay at their authored poses, and the camera and debug geometry follow the model’s frame. Without bound root bodies, the viewer assumes both frames coincide.Other geometry: Model shapes come from the supplied stage. The viewer does not update its authored deformable prims.
show_triangles,show_deformable_visual_meshes, andshow_particlesenable separate overlays, all off by default here. Hidden overlay geometry may still be registered in the viewer’s subtree.Stage ownership: The viewer keeps its camera, render product, and debug geometry under
/__newton_viewerand never clears the stage.set_model()and eachend_frame()write above the stage’s current write floor and then advance it, so finish your own writes to the stage before calling them. Bound prims keep their last world pose after the viewer releases the stage. The stage needs GPU hierarchy computation.
To replicate an asset across environments, clone it in the stage and replicate the same prototype with
replicate(). Each world must sit where the stage places its clone, and its body labels must
name the clone’s prims. The example below imports env_0 as the prototype, makes its labels relative to env_0,
and lets label_prefixes root each world’s labels at its own environment:
import ovrtx

ovrtx.register_schema_paths()

import ovstage
import warp as wp
from pxr import Gf, Usd, UsdGeom, UsdLux

import newton
import newton.examples
import newton.viewer

env_count, spacing = 4, 2.5
envs = [f"/World/envs/env_{i}" for i in range(env_count)]

# Author lights, a ground, one placed Xform per environment, and the robot in env_0.
scene = Usd.Stage.CreateNew("scene.usda")
UsdGeom.SetStageUpAxis(scene, UsdGeom.Tokens.z)
UsdLux.DomeLight.Define(scene, "/World/Light").CreateIntensityAttr(1000.0)
ground = UsdGeom.Plane.Define(scene, "/World/Ground")
ground.CreateWidthAttr(50.0)
ground.CreateLengthAttr(50.0)
for i, env in enumerate(envs):
    UsdGeom.Xform.Define(scene, env).AddTranslateOp().Set(Gf.Vec3d(spacing * i, 0.0, 0.0))
scene.DefinePrim(f"{envs[0]}/Robot").GetReferences().AddReference(newton.examples.get_asset("ant.usda"))
scene.Save()

# Populate the stage and clone the robot into the other environments.
stage = ovstage.Stage(
    "scene",
    config=ovstage.StageConfig(
        runtime_default_hierarchy_computation_model=ovstage.HierarchyComputationModel.GPU_INCREMENTAL
    ),
)
ovstage.population.open_usd(stage, "scene.usda", ordinal=1)
stage.clone(f"{envs[0]}/Robot", [f"{env}/Robot" for env in envs[1:]], ordinal=2)
stage.advance_write_floor(2).wait()

# Replicate env_0 at the stage's placements, labeled with each environment's prim paths.
prototype = newton.ModelBuilder()
prototype.add_usd("scene.usda", root_path=envs[0])
for labels in (prototype.body_label, prototype.joint_label, prototype.shape_label, prototype.articulation_label):
    labels[:] = [label.removeprefix(f"{envs[0]}/") for label in labels]
builder = newton.ModelBuilder()
builder.replicate(
    prototype,
    env_count,
    xforms=[wp.transform((spacing * i, 0.0, 0.0), wp.quat_identity()) for i in range(env_count)],
    label_prefixes=envs,
)
builder.add_ground_plane()
model = builder.finalize()

viewer = newton.viewer.ViewerRTX(ovstage=stage)
viewer.set_model(model)

# at every frame:
viewer.begin_frame(sim_time)
viewer.log_state(state)
viewer.end_frame()
Recording and Offline Viewers#
Recording to File (ViewerFile)#
The ViewerFile backend records model and state
snapshots to JSON or binary files for later visual playback or programmatic
inspection. This is useful for capturing simulation motion for debugging or
sharing.
A ViewerFile recording contains:
the
Modelpassed toset_model();every Warp array stored directly on each
Statepassed tolog_state().
It does not currently contain contacts, custom primitives, scalar or array
diagnostics, solver internals, or the simulation timestamps passed to
begin_frame(). Loading a recording restores the
captured model and state snapshots; it does not re-execute the simulation.
Solver configuration, controls, contacts, and other simulation inputs must be
captured separately if they are needed to reproduce a run.
File formats:
.json: Human-readable JSON format (no additional dependencies).bin: Binary CBOR2 format (more efficient, requirescbor2package)
To use binary format, install the optional dependency:
pip install cbor2
Recording static state snapshots:
import tempfile, os

builder = newton.ModelBuilder()
body = builder.add_body(mass=1.0)
model = builder.finalize()
state = model.state()

# Record to JSON format (human-readable, no extra dependencies)
output_path = os.path.join(tempfile.mkdtemp(), "simulation.json")
viewer = newton.viewer.ViewerFile(output_path)

viewer.set_model(model)

sim_time = 0.0
# Record five snapshots of the current static state
for _ in range(5):
    viewer.begin_frame(sim_time)
    viewer.log_state(state)
    viewer.end_frame()
    sim_time += 1.0 / 60.0

# Close to save the recording
viewer.close()
...
This minimal snippet records a static state to demonstrate the ViewerFile
API. Use the built-in recording example below to capture simulation motion.
Loading and playing back recordings:
Use ViewerFile to load a recording, then restore the model and state for a given frame. Use ViewerGL (or another rendering viewer) to visualize.
# Load a recording for playback
viewer_file = newton.viewer.ViewerFile(output_path)
viewer_file.load_recording()

# Restore the model and state from the recording
model = newton.Model()
viewer_file.load_model(model)
print(f"Frames: {viewer_file.get_frame_count()}")

state = model.state()
viewer_file.load_state(state, frame_id=0)  # frame index in [0, get_frame_count())
Frames: 5
To try the complete workflow with the built-in examples:
uv run --extra examples -m newton.examples recording
uv run --extra examples -m newton.examples replay_viewer
example_recording.py simulates humanoids across multiple worlds and writes
the model and state snapshots to humanoid_recording.bin. In the replay
viewer, select that file to scrub through the captured state snapshots.
ViewerFile captures all direct Warp-array attributes of the logged
State, regardless of which worlds are selected with
set_visible_worlds(). Large states and long
runs can therefore use substantial memory and disk space. Set
max_history_size when constructing ViewerFile to retain only the latest
bounded number of snapshots. Per-world capture is not currently supported.
Rendering to USD#
Instead of rendering in real-time, you can also render the simulation as a time-sampled USD stage to be visualized in Omniverse or other USD-compatible tools using the ViewerUSD backend.
viewer = newton.viewer.ViewerUSD(output_path="simulation.usd", fps=60, up_axis="Z")

viewer.set_model(model)

# at every frame:
viewer.begin_frame(sim_time)
viewer.log_state(state)
viewer.end_frame()

# Save and close the USD file
viewer.close()
External Integrations#
Rerun Viewer#
The ViewerRerun backend integrates with the rerun visualization library,
enabling real-time or offline visualization with advanced features like time scrubbing and data inspection.
Installation: Requires the rerun-sdk package:
pip install rerun-sdk
Usage:
# Default usage: spawns a local viewer
viewer = newton.viewer.ViewerRerun(
    app_id="newton-simulation"
)

# Or specify a custom server address for remote viewing
viewer = newton.viewer.ViewerRerun(
    address="rerun+http://127.0.0.1:9876/proxy",
    app_id="newton-simulation"
)

viewer.set_model(model)

# at every frame:
viewer.begin_frame(sim_time)
viewer.log_state(state)
viewer.end_frame()
By default, the viewer will run without keeping historical state data in the viewer to keep the memory usage constant when sending transform updates via log_state().
This is useful for visualizing long and complex simulations that would quickly fill up the web viewer’s memory if the historical data was kept.
If you want to keep the historical state data in the viewer, you can set the keep_historical_data flag to True.
The rerun viewer provides a web-based interface with features like:
Time scrubbing and playback controls
3D scene navigation
Data inspection and filtering
Recording and export capabilities
Jupyter notebook support
The ViewerRerun backend automatically detects if it is running inside a Jupyter notebook environment and automatically generates an output widget for the viewer
during the construction of ViewerRerun.
The rerun SDK provides a Jupyter notebook extension that allows you to visualize rerun data in a Jupyter notebook.
You can use uv to start Jupyter lab with the required dependencies (or install the extension manually with pip install rerun-sdk[notebook]):
uv run --extra notebook jupyter lab
Then, you can use the rerun SDK in a Jupyter notebook by importing the rerun module and creating a viewer instance.
viewer = newton.viewer.ViewerRerun(keep_historical_data=True)
viewer.set_model(model)

frame_dt = 1 / 60.0
sim_time = 0.0

for frame in range(500):
    # simulate, step the solver, etc.
    solver.step(...)

    # visualize
    viewer.begin_frame(sim_time)
    viewer.log_state(state)
    viewer.end_frame()

    sim_time += frame_dt

viewer.show_notebook()  # or simply `viewer` to display the viewer in the notebook
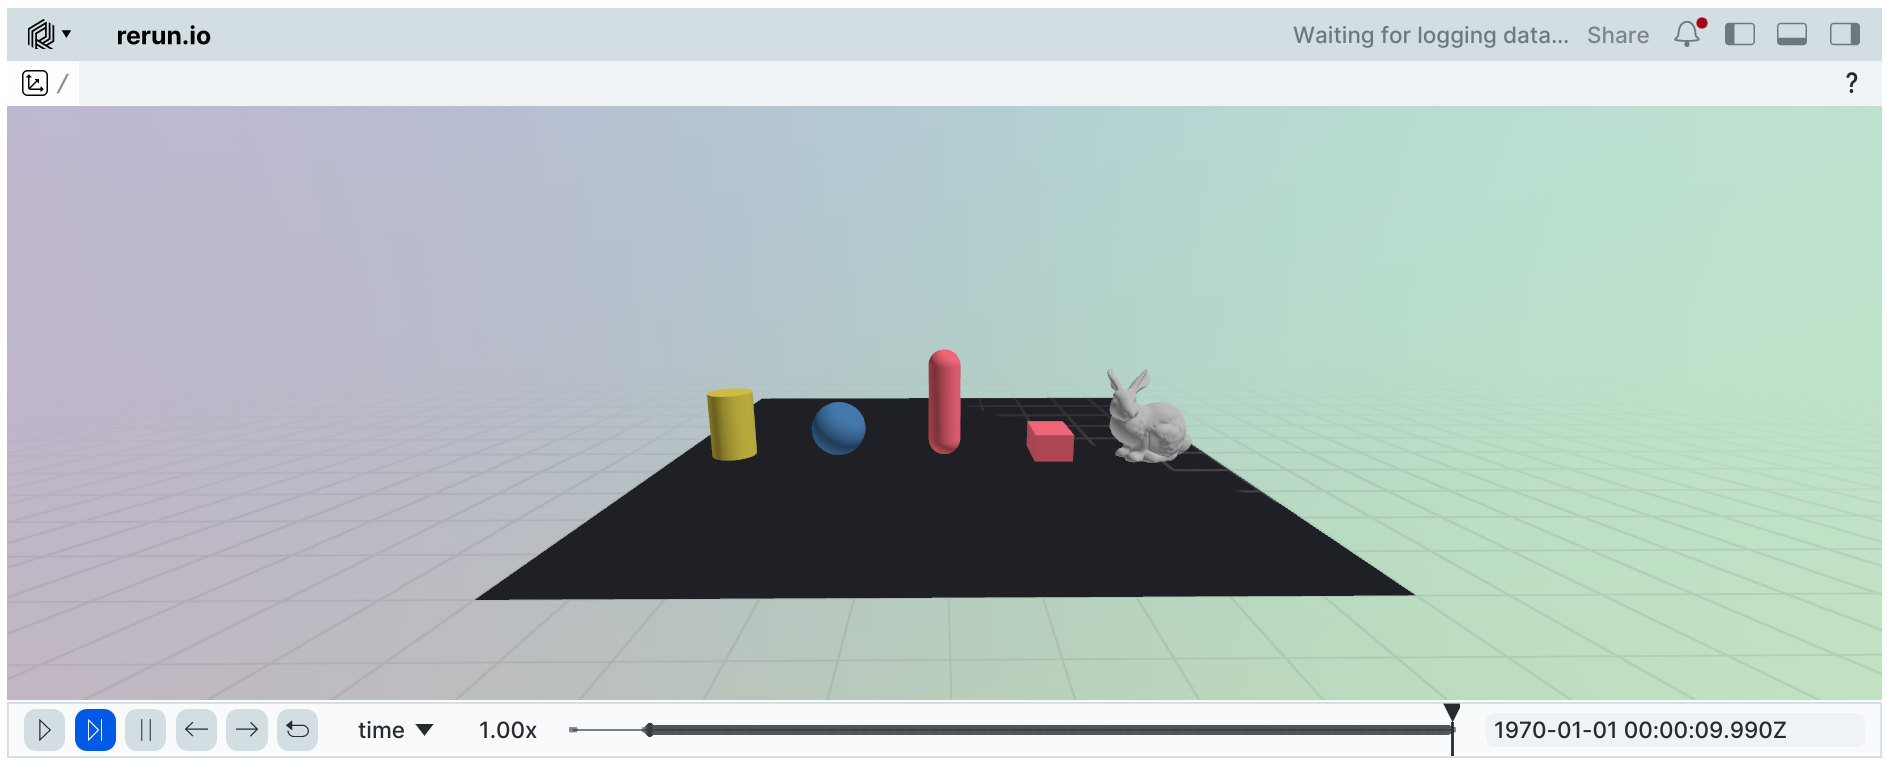
The history of states will be available in the viewer to scrub through the simulation timeline.
Viser Viewer#
The ViewerViser backend integrates with the viser visualization library,
providing web-based 3D visualization that works in any browser and has native Jupyter notebook support.
Installation: Requires the viser package:
pip install 'viser>=1.1.1'
Usage:
# Default usage: starts a web server on port 8080
viewer = newton.viewer.ViewerViser(port=8080)

# Open http://localhost:8080 in your browser to view the simulation

viewer.set_model(model)

# at every frame:
viewer.begin_frame(sim_time)
viewer.log_state(state)
viewer.end_frame()

# Close the viewer when done
viewer.close()
--paused also applies when launching examples with --viewer viser.
The native Simulation panel provides Pause, Step, and Reset; the Examples
panel can switch scenarios without reconnecting the browser. Example controls
run on the simulation thread. A Layers panel toggles visibility of named
simulation layers, including the multi-solver overlay example.
Press-and-hold buttons use browser heartbeats
and release within 150 ms of the last heartbeat, or immediately on disconnect.
For application-specific panels, lighting, or scene tools, use the read-only
server property to access the native Viser API:
with viewer.server.gui.add_folder("Diagnostics"):
    viewer.server.gui.add_markdown("Application-specific status")
viewer.server.scene.configure_environment_map(hdri="studio", background=False)
The viewer owns this server and stops it when closed. Native Viser callbacks
run asynchronously; enqueue changes to simulation state and consume them on
the simulation thread before stepping. The common ImGui-style callback adapter
supports buttons, checkboxes, radio buttons, float/int sliders, float inputs,
text, separators, disabled scopes, and button hold state. The same_line
layout helper is a no-op. See
register_ui_callback() for the complete subset.
The adapter reports is_available = False because no full ImGui context is
present; registered callbacks still run. Unsupported calls raise an
AttributeError directing you to viewer.server.gui. Use that native API
for richer interfaces.
Bind each layer’s model with activate() and set_model() before capturing
its CUDA graph, and call apply_forces(state) for that active layer during
capture. Picking uses device state, so picks made later in the browser take
effect on graph replay. clear_all_layers() restores the default Viser camera
when switching examples; clearing one layer preserves the current view.
Textured meshes preserve texture alpha and display opacity using glTF blend
materials. A textured instance batch can share one opacity value; Viser does
not expose varying per-instance opacity for textured batches. Such requests
warn and retain the mesh material’s opacity. Applications using
log_instances() can use separate batches for
different opacities. Untextured batches support per-instance opacity directly.
Recording and playback
ViewerViser can record simulations to .viser files for later playback:
# Record to a .viser file
viewer = newton.viewer.ViewerViser(record_to_viser="my_simulation.viser")

viewer.set_model(model)

# Run simulation...
for frame in range(500):
    viewer.begin_frame(sim_time)
    viewer.log_state(state)
    viewer.end_frame()
    sim_time += frame_dt

# Save the recording
viewer.save_recording()
The recorded .viser file can be played back using the viser HTML player.
Jupyter notebook support
ViewerViser has native Jupyter notebook integration. When recording is enabled, calling show_notebook()
will display an embedded player with timeline controls:
viewer = newton.viewer.ViewerViser(record_to_viser="simulation.viser")
viewer.set_model(model)

# Run simulation...
for frame in range(500):
    viewer.begin_frame(sim_time)
    viewer.log_state(state)
    viewer.end_frame()
    sim_time += frame_dt

# Display in notebook with timeline controls
viewer.show_notebook()  # or simply `viewer` at the end of a cell
When no recording is active, show_notebook() displays the live server in an IFrame.
The viser viewer provides features like:
Real-time 3D visualization in any web browser
Interactive camera controls (pan, zoom, orbit)
Native simulation and visualization controls
Interactive transform gizmos and object picking
A selected-image panel and live scalar plots
GPU-accelerated batched mesh rendering
Recording and playback capabilities
Public URL sharing via viser’s share feature
Utility Viewers#
Null Viewer#
The ViewerNull provides a no-operation viewer for headless environments or automated testing where visualization is not required.
It simply counts frames and provides stub implementations for all viewer methods.
builder = newton.ModelBuilder()
body = builder.add_body(mass=1.0)
model = builder.finalize()
state = model.state()
sim_time = 0.0

viewer = newton.viewer.ViewerNull(num_frames=10)
viewer.set_model(model)

while viewer.is_running():
    viewer.begin_frame(sim_time)
    viewer.log_state(state)
    viewer.end_frame()
    sim_time += 1.0 / 60.0

print(f"Ran {viewer.frame_count} frames")
Ran 10 frames
This is particularly useful for:
Performance benchmarking without rendering overhead
Automated testing in CI/CD pipelines
Running simulations on headless servers
Batch processing of simulations
Custom Visualization#
In addition to rendering simulation state with log_state(), you can draw custom debug overlays using the log_* methods available on all viewers.
Drawing lines:
Use log_lines() to draw line segments — useful for visualizing forces, rays, or normals:
# Draw force vectors at body positions
viewer.log_lines(
    "/debug/forces",
    starts=positions,        # wp.array[wp.vec3]
    ends=positions + forces, # wp.array[wp.vec3]
    colors=(1.0, 0.0, 0.0), # red
    width=0.005,
)
Drawing points:
Use log_points() to draw a point cloud:
viewer.log_points(
    "/debug/targets",
    points=target_positions, # wp.array[wp.vec3]
    radii=0.02,              # uniform radius, or wp.array[wp.float32]
    colors=(0.0, 1.0, 0.0),  # green
)
Visualizing contacts:
Use log_contacts() to draw contact normals from a Contacts object.
The viewer’s show_contacts flag (toggled in the ViewerGL sidebar) controls visibility:
viewer.log_contacts(contacts, state)
Contact normals, mode disks, and force arrows are sized relative to the smaller
shape in each contact pair. Use the Contact Relative Scale control to adjust
all contact glyphs while preserving their proportions across differently sized
contacts. To infer contact modes and draw force arrows, request the solver’s
CONTACT_F observable, pass it to the solver step, and provide the resulting
observables to the viewer:
viewer.log_contacts(contacts, state, observables=observables)
See Solver Observables for allocation, contact-buffer identity, and backend
support. Without force output, mode disks are amber (unknown) and force arrows
are hidden. With force output, disks are black for open contacts, light gray for
sticking contacts, and blue for slipping contacts. A measured force magnitude
at or below contact_mode_eps_force is open, including zero force when the
threshold is zero.
Default force-arrow calibration uses the average dynamic mass of populated local
worlds plus shared global dynamic mass, so replicating identical worlds does not
change arrow lengths. Set viewer.contact_force_scale after attaching the
model to override the calibration.
Transform gizmos:
Use log_gizmo() to display a coordinate-frame gizmo at a given transform:
viewer.log_gizmo("/debug/target_frame", wp.transform(pos, rot))
Logging images:
Use log_image() to display images (including per-view
outputs from SensorCamera). By default, non-headless
ViewerGL and ViewerRTX show logged images
as dockable windows. Pass fullscreen=True to draw the image as the main viewer
surface for the current frame instead of the 3D scene. ViewerViser
displays the selected stream in a persistent native Images panel and accepts,
but ignores, the fullscreen option. Accepted shapes are (H, W), (H, W, C),
(N, H, W), and (N, H, W, C) with C in (1, 3, 4). Accepted dtypes are
uint8 (values in [0, 255]) and float32 (values in [0, 1]; values outside
the range are clipped).
from newton.sensors import SensorCamera

builder = newton.ModelBuilder()
builder.add_body(mass=1.0)
model = builder.finalize()

viewer = newton.viewer.ViewerNull()
viewer.set_model(model)

# Grayscale heatmap: normalize to [0, 1] before logging so float32
# values land in the accepted range.
depth_image = np.full((16, 16), 2.0, dtype=np.float32)
heatmap = depth_image / max(depth_image.max(), 1e-6)
viewer.log_image("heatmap", heatmap)

# Per-view color images from a camera sensor. Allocate the sensor output
# once and reuse it every frame; the RGBA conversion is a zero-copy view.
camera = SensorCamera(model)
view_count, width, height = 1, 16, 16
color_image = camera.allocate_image_color(view_count, width, height)
# ... in a real pipeline, camera.update(...) fills color_image each frame.
rgba = SensorCamera.Utils.to_rgba_from_color(color_image)
viewer.log_image("camera", rgba)
For a 3D input, a last-axis of 1, 3, or 4 is interpreted as channel count
for a single (H, W, C) image; otherwise the array is interpreted as a
batch (N, H, W) of grayscale images. Pass a 4D array if the
disambiguation matters.
Use fullscreen=True for image-first viewers, camera-debug views, or headless
frame capture where the image should replace the 3D scene:
from newton.sensors import SensorCamera

builder = newton.ModelBuilder()
builder.add_body(mass=1.0)
model = builder.finalize()

viewer = newton.viewer.ViewerNull()
viewer.set_model(model)

# Per-view color images from a camera sensor. Allocate the sensor output
# once and reuse it every frame; the RGBA conversion is a zero-copy view.
camera = SensorCamera(model)
view_count, width, height = 1, 16, 16
color_image = camera.allocate_image_color(view_count, width, height)
# ... in a real pipeline, camera.update(...) fills color_image each frame.
rgba = SensorCamera.Utils.to_rgba_from_color(color_image)
viewer.log_image("camera", rgba, fullscreen=True)
For ViewerGL and ViewerRTX, the
fullscreen=True selection is per-frame: call
log_image() with fullscreen=True after
begin_frame() and before
end_frame() on every frame that should show the
image. If a frame does not log a fullscreen image, the viewer renders the 3D scene
for that frame. ViewerRTX ignores images in headless mode.
ViewerViser retains its Images panel and updates only the
stream selected there. Other viewer backends inherit the no-op base implementation
and ignore both the image and the fullscreen option.
Camera and world layout:
Set the camera programmatically with set_camera().
pitch and yaw are specified in degrees:
viewer.set_camera(pos=wp.vec3(5.0, 2.0, 3.0), pitch=-20.0, yaw=30.0)
viewer.camera_speed = 0.2  # m/s
When visualizing multiple worlds, use set_world_offsets() to arrange them in a grid
(must be called after set_model()):
viewer.set_world_offsets(spacing=(5.0, 5.0, 0.0))